Are you thinking about adding a barn wood accent wall to bring texture and character to a wall in your home? Here you will find step by step instructions on how I installed this stunning feature to an accent wall in my Concord home plan built by McArthur Homes.
As I was debating what I wanted to do with the huge accent wall in my dining area, I fell in love with the reclaimed wood walls I saw all over Pinterest. Since I enjoy DIY projects, this was a project I was willing to tackle!
Here’s the simple step by step process to create your own stunning and housewarming barn wood wall:
1.) The very first thing I did was measure my wall which was 13×8 (I measured from the top of my baseboards because I knew I wanted to keep them on).
2.) Next, I began my hunt to find the barn wood for my project and ended up finding a local Utah company on Facebook called Barn Wood Recyclers. I highly recommend them!
Lee with Barn Wood Recyclers was great and fun to work with! Plus he was just as excited about my project as I was, and he gave me some great tips on how to successfully build my wall.
3.) I bought two sizes of reclaimed wood. The large pieces were around 5 inches and the small pieces were around 2 1/2 inches wide.
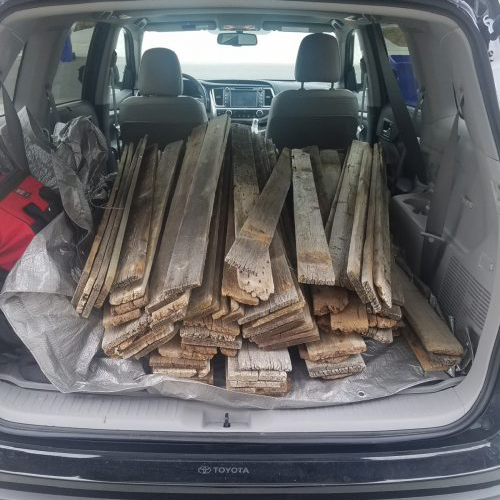
Once home I unloaded all the wood and got right to work planning how my wall was going to look.
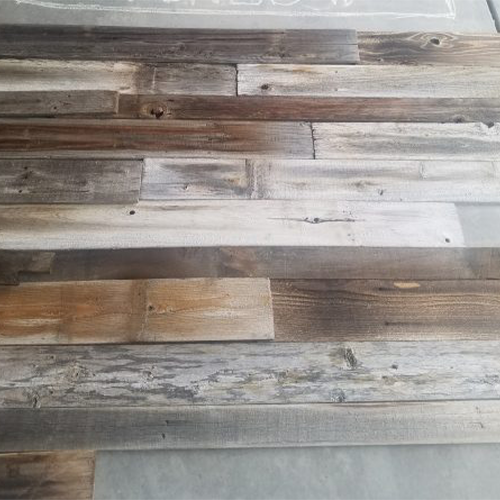
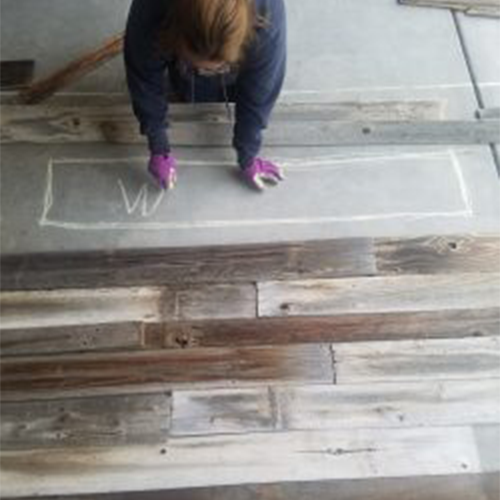
4.) I drew a 13 x 8 rectangle with chalk on my garage floor and also measured and drew in the rectangle shaped window as well.
I started from the bottom and worked my way up. I bought more small boards than big, so my pattern went two rows of small and one row of big.
I was able to see how I wanted the colors to flow and what my end product would look like.
This was actually really fun!
5.) The tools I used for my project were: a compressor, miter saw, jigsaw, finishing nailer (with 1-1/4 brads), chalk and measuring tape.

If power tools make you nervous, then this project is probably not for you! I had to work around a window, and my kitchen ceiling sits slightly lower, making for some interesting angles and a lot of cuts. If your wall is a simple square or rectangle, it will be MUCH easier!
If the pieces of wood had ragged or uneven edges, I sawed them off with the miter saw. I also used the miter saw to cut them to the proper length.
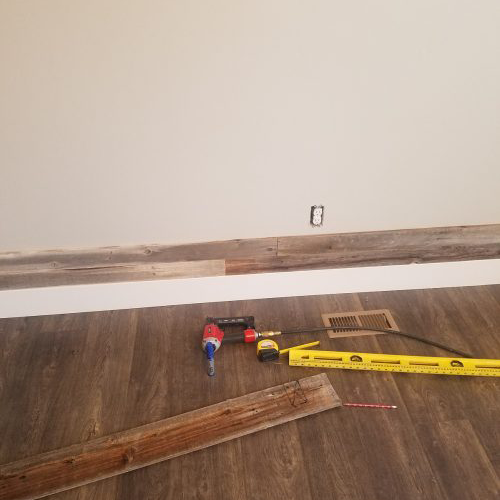
6.) Staggering each row was important to me; I didn’t want any of the boards to line up. This was pretty easy because I could do it by eyesight.
7.) I used a finishing nailer to nail the wood onto the wall. I used this nailer because the nail holes are not very big and they blend well with the reclaimed wood. I put at least fifteen nails in each piece of wood. They’re not going anywhere!
8.) When I got to the outlet I removed the cover and measured where it would fall on the wood; I drew the measurements on the back with a marker and cut it out with the jigsaw. I had to buy longer screws to put the plate back on, but it went back on perfectly with the new screws.
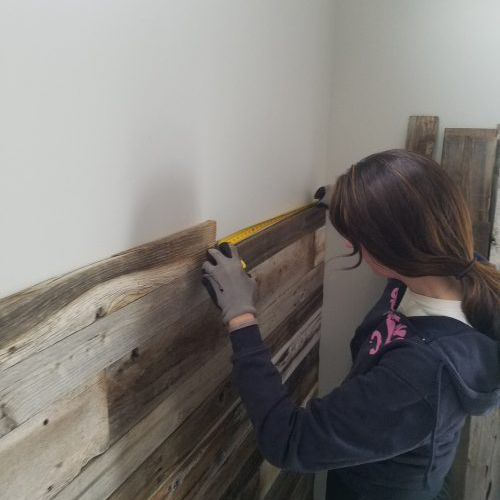
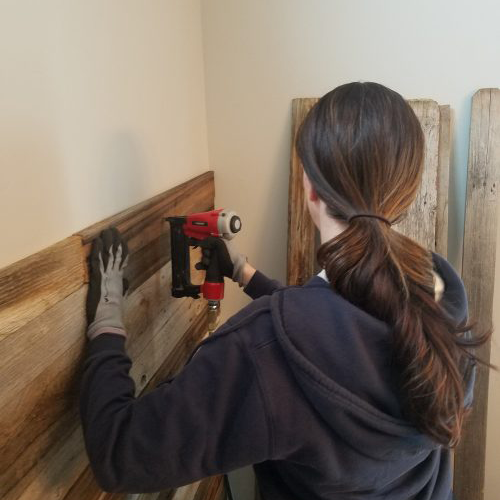
9.) After the hole had been cut for the outlet, I continued my two rows of small boards and one row of big all the way up to the window. Easy peasy!
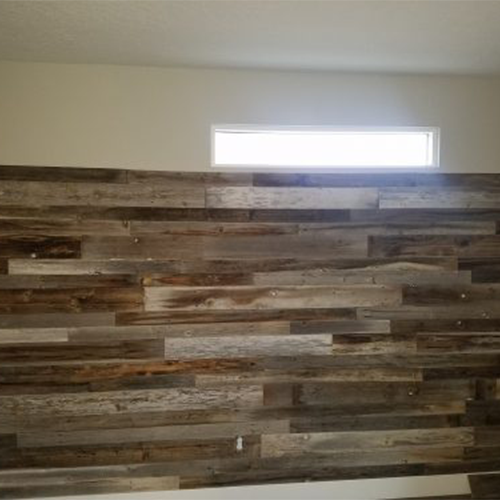
10.) The work between the outlet and window was easy sailing. Once I got to the window, it got a bit more complicated.
I had to make a ton of cuts and measuring correctly was REALLY important! I lost a few pieces of beautiful wood because I didn’t measure properly!
I held the wood up to the window and drew with a pencil where I needed to make cuts. I also measured on the wall and window to make sure the lines I drew on the wood had the same measurements.
I made all these cuts with a jigsaw.
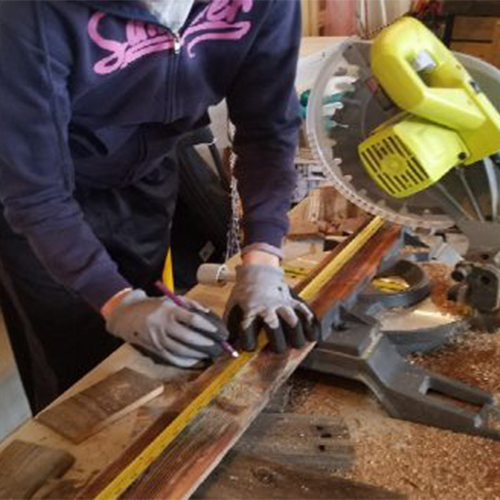
Once again make sure you measure!! So many times I had to go back and recut or shave more off. After all the tricky cuts around the window and kitchen cabinets were finished, I continued my pattern up until I hit the ceiling. I had to cut all the boards that touched the ceiling. These were pretty simple cuts with the jig saw.
Finished!!! I chose not to sand or seal the barn wood ( I didn’t want to change the color or texture of the barn wood). It looks AMAZING and the colors look great together.
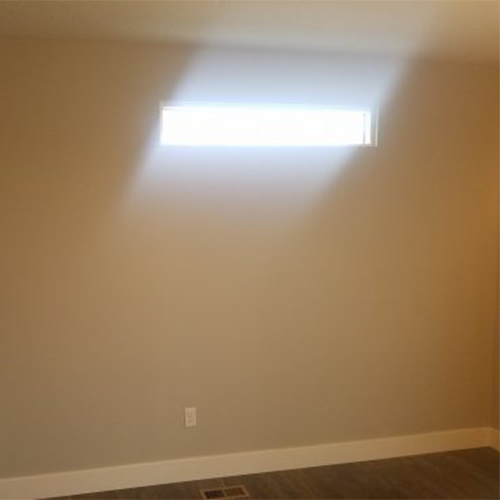
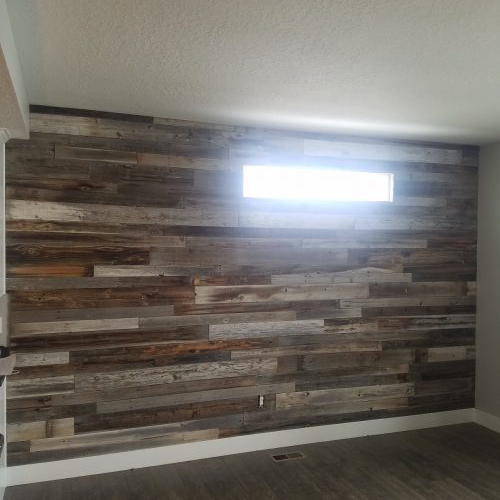
I am so happy with how it turned out!
EVERYONE who visits makes a comment about my wall, and they ask me how I did it. Now you know!
Be sure to visit www.mcarthurhomes.com to see the Concord floor plan and all the other beautiful floor plans McArthur Homes offers.